Yesterday was a busy day but I really wanted to get a post in!
First I want to take a minute and plug my friend Jerry's sewing blog,
Jerry Lee's Western Wear. It's
really awesome, and I'm not just saying that because I know him! He writes about sewing techniques and showcases new projects, and his embroidery and hand-tailored western shirts are truly inspiring and worth a look.
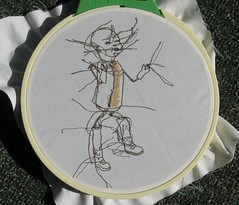
Today I have a little more time and thought I'd talk about why I chose to do the terrifying baby automaton embroidery in reverse punch needle. In a lot of ways my choice doesn't particularly make sense. It's a technique that, right side up, is designed to showcase looped pile, and it leaves little threads all over the wrong side. (These can actually be carefully pulled through the fabric if you really want to, but I ended up deciding I liked the look.) The wrong side basically just looks like a running stitch, so why do it?
Here is an image of the "back" of my embroidery which, if I were doing it as a proper punch needle embroidery, would be the front.
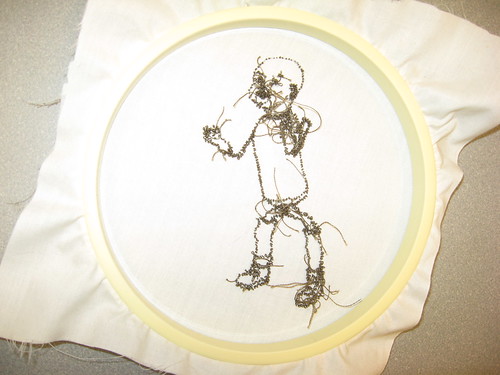
If this were truly the front of the embroidery there would be no little threads -- this is where I pulled some through. Yes, I actually did "clean" up my "right" side. (This is getting confusing!) There would have been a lot more loose threads if I had not done this.
For me, the choice to use this technique was a combination of speed and stitch size. I really, REALLY love tiny tiny stitches, but the back tends to get pretty lumpy when you do small stitches with something like a
backstitch. Using the wrong side of the punch needle embroidery keeps things flatter and tidier on top.
As for speed, this is negotiable. A lot of people find punch needle tedious and difficult. To them I say -- I may not be the person to ask. I tend to work very slowly and meticulously and so my normal work speed is snail-like. To me punch needle seems fast, but to you it may not.
A big part of being able to go quickly with punch needle is having excellent tools. A cheap, dull needle will slow you down, as will an inadequate hoop or the wrong fabric.
Some quick tips for a not-as-frustrating punch needle experience:
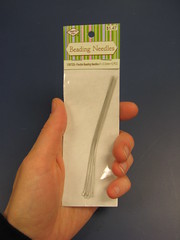
1) Don't buy the cheapest needle, get the
Clover punch needle. For this embroidery I used the tiny one-strand needle, though for the avocado.jpg embroidery I used the 3-strand version. There is also a 6-strand version.
2) You need a good,
tight hoop that holds the fabric extremely taut.
If you can't find a good hoop, I've made do with a normal hoop, the larger part of which I glued thin slivers of wine cork to at intervals around the hoop. This helped create more friction between the hoops to hold the fabric better. You'll still have to pull it tight every few minutes, but it buys you a little more time. However, you will have to pull it tight occasionally no matter how good your hoop.
3) I've had the most luck with a good, tightly woven cotton fabric.
4) Technique: the best tip I can offer is: don't lift your punch needle. Ever. Punch it through the fabric, pull it back through verrrrry gently, and scratch it across the top of the fabric to where you want to make the next stitch.
In other news, I'm ALMOST DONE with the rug I've been working on for very nearly a year. Within the week I should have a pic!